Showing posts with label recipe. Show all posts

Thursday, December 22, 2011

cheap and easy fudge

If my last fudge recipe was overwhelming or too expensive. Try this old standby, from an evaporated milk brand website.

Here's what you need:
3 cups semi-sweet chocolate chips
1 14oz. can of sweetened condensed milk
1 ½ teaspoons of vanilla extract
Dash of salt

Line a 8x8 baking pan with parchment paper.
Combine all ingredients in a heavy sauce pan. Stir over low heat until chocolate is melted.
Pour into pan. Chill for 2 hours. Cut into 64 1-inch squares.
Store in an air tight container in the fridge. Share with friends, family, and coworkers.

When I poured this into the pan, it felt a little sad, especially next to the salted caramel masterpiece from yesterday. So I pressed holiday-colored chocolate candies into the top to dress it up. Much more festive!

Wednesday, December 21, 2011

salted caramel fudge

Here's what you'll need for the fanciest tasting recipe you'll make all season. This deliciousness is adapted from british measurements at this site.


1 14 oz. can of sweetened condensed milk
1 cup brown sugar
2 tablespoons light corn syrup
¼ cup golden syrup
1 stick of butter
1 cup of white chocolate chips
1 teaspoon of sea salt flakes
Line an 8x8 square baking dish with parchment paper.

Add first five ingredients, save the white chocolate chips and sea salt, to a heavy saucepan. 


The one ingredient you may not have heard of is the Golden Syrup. It’s a British product. A thick, golden syrup that comes in a very cool, vintage-looking can. I was able to find it at Metropolitan Market in Seattle for just under $6. If you can’t find it at your high-end grocery store, they sell it on Amazon. And, although the rest of this recipe is not vegan, the golden syrup is! Some people use it as a substitute for honey.


Cook over low heat stirring constantly until mixture sugar has dissolved. This took me about 12 minutes. 


At this point the original instructions said to increase the heat and bring to a simmer until the mixture thickened and came away from the side of the pan. This never happened for me. I just advise to keep cooking it about 5-10 minutes more.Then remove from heat and stir in the white chocolate until combined and melted. Again, this was not as easy as it sounds. It took me a lot of stirring and the help of my husband smooshing up the chips to get all the chocolate completely melted and combined into the final, beautifully smooth fudge mixture.

One you’ve got the mixture looking good, pour it into your prepared 8x8 pan. Smooth the top, if necessary, and sprinkle with the sea salt flakes, pressing the flakes into fudge with back of spoon to secure, if necessary. My fudge was still pretty soft and liquid when I poured it into the pan so it was smooth and the sea salt flakes kind of melted nicely into the top without much effort.

Set aside for 30 minutes and then chill overnight. Cut into 64 1-inch pieces and refridgerate in an airtight container.

With the imported golden syrup and the sea salt flakes, this is not a cheap recipe. But it’s worth it. It tastes like pure gold and is a great gift for friends, family and coworkers. Trust me, you’re going to want to give this away because 1, when people taste it they will think you are a goddess in the kitchen and 2, you don’t want 64 pieces of this sitting around your house for the whole holiday season.

 Tune in tomorrow for a recipe for the other fudge pictured above (it's much easier!).

Tuesday, October 4, 2011

october

And suddenly it's October. A one week vacation from the blog turned into more than one month. But I'm back.

And to commemorate my return to the blog, in this, my favorite month of the year, I give you the...

PUMPKIN WAFFLE.


When was the last time you picked up a waffle, burning your fingers, to nibble away at the whole thing before you even add syrup or butter or jam? I defy you to not pick up this delicious creation straight off the waffle iron and not say "Ow, ow! Yum! Yum!" as you devour it before it even hits the plate.


This delicious recipe brought to you verbatim from the cooks.com website. Make it this weekend. You won't regret it.

Pumpkin Waffles
3 eggs
2/3 c. milk
1/2 c. cooked pumpkin
2 c. Bisquick mix
2 tbsp. sugar
1/2 tsp. cinnamon
1/2 tsp. nutmeg
1/2 tsp. ginger
1/4 c. salad oil

Beat eggs until lemony yellow, stir in remaining ingredients, and cook batter in waffle iron according to standard directions.

If you want to be really decadent, you can whip up a little cream cheese for the top.

Saturday, July 16, 2011

My Favorite Pasta Recipe

I have to admit that I learned this recipe almost ten years ago from Jamie Oliver when he was on...Oprah. He calls it Funky Spaghetti. I just call it my favorite go-to recipe for flavorful fresh pasta that is not your standard sauce and noodles. And it's the perfect way for me to use my new basil plant!


Here's what you need:
A package of linguine
11 to 14 ounces grape tomatoes, red and/or yellow
2 handfuls of fresh basil, leaves picked
6 to 8 glugs extra-virgin olive oil
2 cloves of garlic (peeled and finely chopped)
Splash of red wine vinegar
Sea salt and freshly ground black pepper


First, boil the water and cook the pasta.
While the noodles are cooking, halve the tomatoes, put them in a large bowl and add the basil, olive oil, garlic and vinegar. Use your hands to "smoosh" all the ingredients together.

Drain pasta and add to the bowl in which you've just smashed up all the other ingredients.
Toss together and serve!


Always make enough for leftovers, because when you open up your lunch at work the next day all your coworkers will be jealous of the garlicky-basil goodness wafting from your direction. And they'll think you're a gourmet cook. They don't have to know how simple it was.

Thursday, July 14, 2011

Apricot Galette

Bonjour! In honor of Bastille Day and Le Tour de France, I give you...the Apricot Galette! This rustic tart is among the easiest desserts possible and yet it is classy and delicious.

These are all the ingredients you need:
1/4 Cup of Slivered or Sliced Almonds
Half a Package of store bought Puff Pastry
3 Tablespoons Apricot Jam
1/4 Cup Powdered Sugar
6-8 Apricots (or any other stone fruit or berry you'd like or have laying around)
1 Tablespoon Granulated Sugar (not pictured, and I skipped, but I think it would improve the recipe)


First: Set one sheet of the puff pastry out to thaw. Wrap the other one up and put it back in the freezer, so it's handy for the next time you want to make this delicious dessert. I set mine out on the baking sheet on a Silpat. If you don't have a Silpat, just lightly butter your pan. Preheat oven to 425 degrees.


Next: Slice up your fruit. I started with whole apricots.


Which I halved and pitted.


And then halved. And halved again.


Next: Measure your sugar and almonds into your food processor and chop up to make a fine powder.


By now your puff pastry should be thawed enough. Unfold it on your pan and roll it/stretch it to desired size (I just left it pretty much as is.) Important! Prick the puff pastry generously with a fork. Spread your powdered sugar and almond mixture over the center of the pastry, leaving about an inch border.


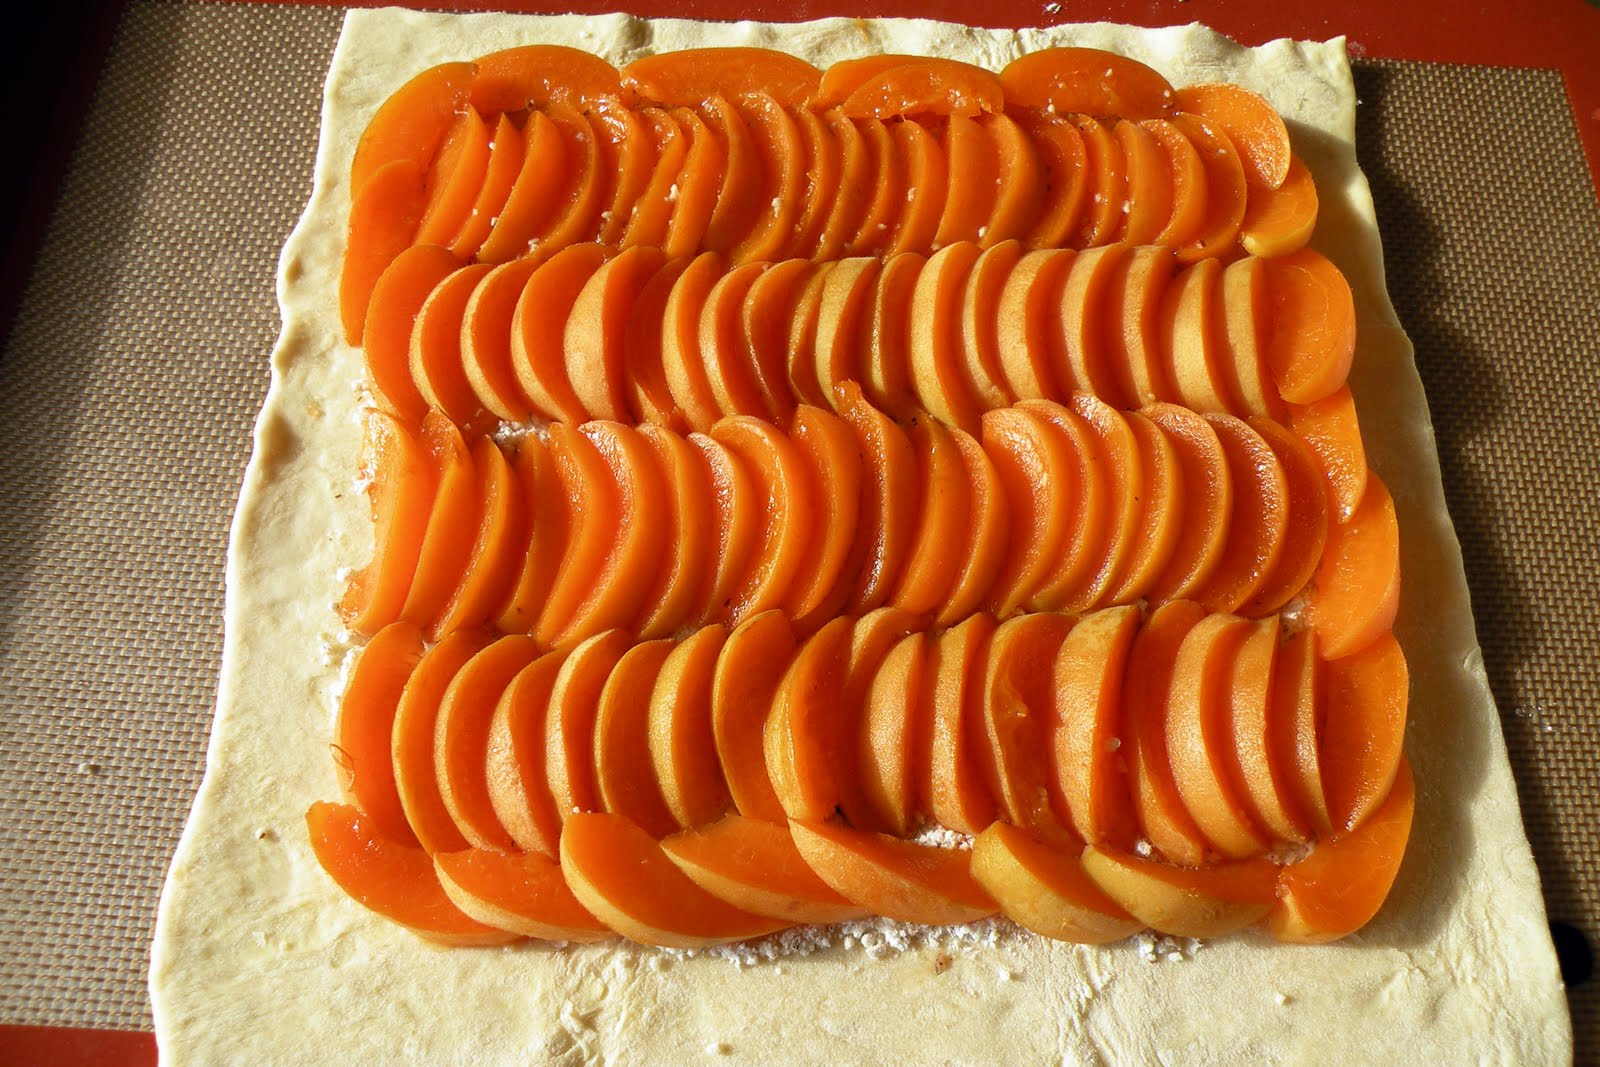
Next arrange your fruit on the center of the pastry, leaving about an inch border. I arranged my apricots in straight lines this time. I think next time I'll try a more complicated pattern or design, but when I was making this my mother-in-law was visiting and I was playing it safe. I didn't want to take any chances with another disaster like the peach clafloutis egg shell fiasco/meltdown of 2010, the last time she visited us.


Once you're happy with the fruit arrangement. Fold over the edges of your pastry shell. Top with the granulated sugar and the apricot jam.


Bake for about 30 minutes. Until it looks golden brown and puffy.


I served mine with ice cream. Which probably isn't very French, but chacun son goût.


Bon appetit!

Tuesday, July 5, 2011

Fourth of July Feasting

I hope everyone had a great weekend and, if you're in the United States, a fabulous Fourth! I have lots of feasting and fun to share with you. We got out of town as fast as we could on Friday so we could start the weekend off right.


After cruising around for awhile in search of the perfect spot, we found ourselves in a quiet cove on Bainbridge Island. Guess we didn't have to go that far for peace and quiet, since we could still see downtown.

My extraordinary husband/chef spent all day prepping for two of our weekend feasts. The first night's menu? Mussels, Salmon, and an original recipe Potato Salad.

Mussels are good for you and good for the environment because they can be sustainably raised and help clean the sea floor. Eat up!


Then on to the Cedar-Planked Salmon. Tip: Make sure you soak the cedar plank for a looong time. Much longer than I soaked it, at least. (Soaking the plank was my one task in preparing this meal. Fail.) If not soaked long enough, you might emerge from the cabin to find your dad holding a flaming cedar plank in a pair of tongs over the edge of the boat. Crisis narrowly averted.

Sadly, I have no pictures of the flames because I was dashing for a fire extinguisher.


Fortunately, the fish made it through unscathed. The grill may never be the same.


And finally, on to the yummy potato salad for some essential carbs. Also featuring one of my favorite food groups: Bacon.


Fingerling Potato Salad with Asparagus, Blue Cheese, and Bacon
1-2 pounds fingerling potatoes
Small handful of asparagus
5-6 Strips of Bacon
Equal parts sour cream, blue cheese dressing, and mayonnaise, to taste
Chopped Green Onion
Minced Parsley
Generous Salt and Pepper to taste

Line a baking sheet with foil, evenly space bacon strips on sheet. Bake in preheated 425 degree oven for 15-20 minutes. The crispier the better for this recipe. When cool, chop or crumble into bite sized pieces.

Leave oven on (or cook at the same time as the potatoes). Place asparagus on foil lined cooking sheet. Mist very lightly with olive oil and sprinkle with salt and pepper. Place in 425 degree oven for 15 minutes. When done and cool, slice into 1-2 inch pieces.

Chop potatoes into 1-inch chunks. Boil in salted water for 10-15 minutes. Set aside to cool.

Mix cool ingredients in bowl and gently fold in dressing mixture and onions and parsley. Season generously to taste.

Enjoy! And stay tuned for more Fourth of July food and fun, coming soon!

Wednesday, June 29, 2011

Garlic Basil Grilled Chicken with Caprese Salad

The other night we (and by we, I mean my husband, who is much calmer in the kitchen) made the Garlic Basil Grilled Chicken with Caprese Salad recipe from this month's Sunset magazine. Trust me, this recipe is a keeper. It was so easy, fresh and contains many ingredients you may have on hand or in your garden. Note to self: buy a basil plant!


Here's how we adjusted the recipe slightly for two. Click here for the original recipe.

Chicken
  • 1 cup fresh basil leaves
  • 3 garlic cloves
  • 1/4 cup olive oil
  • 1/2 teaspoon kosher salt
  • 1 teaspoon pepper
  • 2 small boneless chicken breast halves 
Mince basil and garlic and mix with other ingredients in small bowl. Coat chicken breasts. Grill chicken until cooked through on outside grill or, in our case as we are apartment dwellers, the George Forman. :)

 It's not often that raw chicken looks so good I want to photograph it!


Caprese Salad
  • A few handfuls of heirloom and grape tomatoes
  • 6 slices slices of fresh, hand stretched mozzarella
  • 1 cup roughly chopped fresh basil leaves
  • 1/4 cup extra-virgin olive oil
  •  A few dashes of fig balsamic vinegar
  • 2 garlic cloves, minced
  • 1 teaspoon kosher salt
  • 1 teaspoon pepper
Halve grape tomatoes and slice larger tomatoes into bite size pieces. Mix tomatoes and other ingredients, except for cheese and let stand. Serve over mozzarella slices.

The perfect addition to the meal, a local olive bread dipped in olive oil and fig balsamic vinegar.

The finished product! Such a refreshing flavor and a great change for a summer meal.

Tuesday, June 14, 2011

Over Ambitious Homemade Indian Food

Good god, what was I thinking making two Indian dishes from scratch for a surprise dinner for hubs? I was clearly in over my head. Yet, somehow I produced two delicious vegan Indian dishes and the only thing I ruined was the rice.

To understand how intimidating this meal was for me to make, look how many ingredients I needed for just one of the dishes: Chickpea and Cauliflower Curry


When B arrived home and I told him what I was making and that maybe I should have just ordered in, he gave me a concerned look that said, yes, ordering in is a much better option because we're both hungry and you look on the verge of a breakdown.

But first, let me tell you about the first item on the menu, Baingan Bharta. When I was traveling in India last year I was so excited to try my favorite dish to order at Indian restaurants back in the US, Baingan Bharta. I searched every menu for my Indian food staple to no avail. What gives? Was it called something different in India? Was it out of season? I asked my Indian coworkers and they laughed at me! "That's home food," they said. "No one would ever order that in a restaurant. Only mothers and home cooks make that." I garnered it was the Indian equivalent to a casserole. One day, my coworker surprised me with a sample. She had her cook make me a special Baingan Bharta. "I told her to not make it too spicy," she said, as I picked up a small bite with my right hand and a piece of homemade chappati. It was like nothing I'd ever had in the US, whole chunks of soft eggplant and tomato that tasted smokey and rich and spicy. I kept my eye out, but even though I was in India for six weeks, I never did see it on a menu.


So last week when Jenna over at Eat, Live, Run, made homemade Baingan Bharta, I was inspired to try it myself. I followed her recipe almost exactly. Somehow mine looks nothing like hers. Probably because she is a trained chef and I'm a stressed out wreck in the kitchen. But anyhow. The only step I skipped was the blender/food processor step at the end. By skipping this step,  my version looked and tasted just like the authentic Indian Baingan Bharta I tasted last year.


Item number two on the menu, Chickpea Cauliflower Curry, was a recipe I half invented and half adapted from Almost Vegetarian by Diana Shaw.

Chickpea Cauliflower Curry
1-2 inch chunk of ginger peeled, minced
4 cloves of garlic, minced
1 tablespoon butter
1 yellow or white onion, diced
1 granny smith apple, cored diced
1 can of chickpeas, drained and rinsed
1 small head of cauliflower, cored and separated into bite-sized florets
1 tomato, chopped
1/2 cup cilantro, chopped
1 tablespoon garam masala
1 tabelspoon ground cumin
2 teaspoons turmeric
Dash of cayenne pepper
Handful of raisins

Saute ginger, garlic, onion, cilantro, and spices in butter  over medium-low heat until onion is translucent.
Stir in apple, chickpeas, and cauliflower and cook over medium-low heat until cauliflower is fork tender. Add the handful of raisins.


The actual cooking of both of these dishes was not complicated. But the prep work took forever. Chopping, chopping, chopping. And I am not the most swift or skilled slicer in the kitchen. I really need someone to teach me the right way to dice an onion. My approach is more like the Swedish Chef with pieces flying every which way rather than anything efficient.

Three hours later, I had miraculously created two spicy vegan Indian dishes (and a gelatinous basmati glob). Paired with some store bought naan (thankfully I didn't try to make that from scratch!), it was pretty delicious, even if I was exhausted.


Next time, remind me that I can just order in.

Now you tell me (using the new improved comment form below!), what's the most surprising or interesting thing you've ever eaten while traveling?

Thursday, June 9, 2011

Yum...Cauliflower?

 
I am a recent cauliflower convert. Lumpy, white and pasty, I've never been quick to reach for it. In other words, I've sniffed my nose and avoided it in distaste. But I've begun to recognize it's merits and they have these adorable wee organic cauliflowers  (read: normal sized) at the market, so yesterday I thought I'd give a new recipe a try.

Roasted Cauliflower with Raisins and Vinaigrette, from this book:


1 head cauliflower, cored, trimmed, and cut into florets (you may want to use 2 heads if you're using an organic one)
1/2 cup extra virgin olive oil
Salt and pepper
2 tablespoons balsamic vinegar to taste
1/2 cup of raisins (I used golden raisins)
1/2 cup chopped parsley leaves

Preheat oven to 400 degrees. 
Put the cauliflower on a roasting pan and drizzle with oil and salt and pepper.
Roast for 15 minutes.
Combine the oil, balsamic vinegar, and salt and pepper.
Remove the pan from the oven after fifteen minutes, and drizzle with some of the vinaigrette. 
Put the pan back in the oven for about 15 more minutes.
Combine the remaining vinaigrette, raisins and parsley in a bowl.
Remove cauliflower from oven and toss with raisin mixture. 
Can be served hot, warm, or at room temperature. 

It's so simple, nutty, and sweet! I served it as a side with baked Copper River Salmon and Sauteed Baby Bok Choy (a not so successful experiment, and hence, not pictured), but it would pair well with pretty much anything.

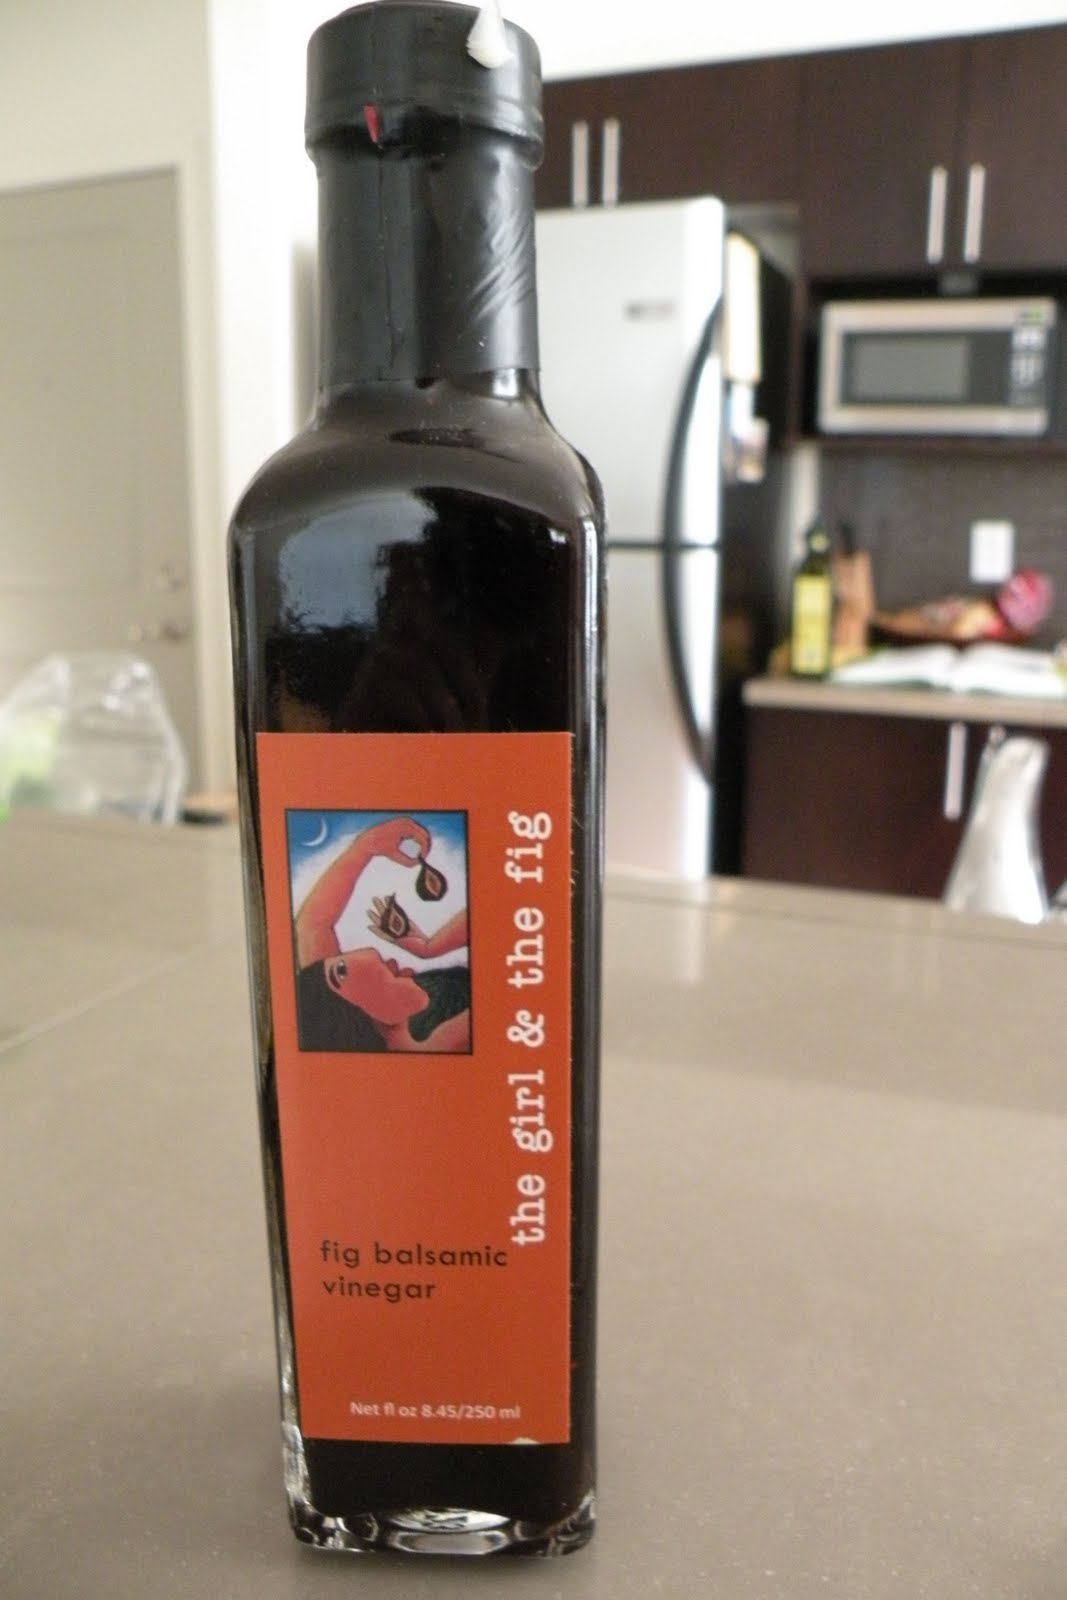
Never mind that this 8 ounce bottle of The Girl and the Fig balsamic vinegar cost more than the bottle of Argentine malbec I bought to go with dinner—it was totally worth it. I actually wanted to lick the bowl.
 

Said bowl pictured here. Not my finest photography. But, then again, maybe cauliflower isn't the most photogenic of vegetables?

Friday, June 3, 2011

Memorial Day Weekend + My Love's Birthday

I sure hope everyone had a fabulous Memorial Day Weekend! It may still be cool here in the Pacific Northwest, but if I've learned one thing since we've been back, it's you can't wait until the weather is nice to do something fun. It was hubs' birthday and we always try to go away and do something special to celebrate and this year was no different. A trip out on my parent's boat was just the relaxing celebration we needed.

And if there is one thing we do well on the boat, it's eat. And this weekend was no different.
Copper River Salmon, from-scratch Carrot Cake, and Mango Salsa are just a few of the treats we dined on this weekend.

The first night we barbequed. It was calm, sunny, and beautiful. Can you imagine a better barbequing spot? I can't.


 We made corn on the cob.


Copper River Salmon

Asparagus


Dined outside.


 And enjoyed the sunset.

The next day was my love's birthday. We played horseshoes, hiked, kayaked, and napped. We snacked on freshly-made mango salsa. This will be a staple recipe. Diced mango, tomato, red onion, pablano pepper, lime juice, salt and pepper. Mix together and enjoy with your favorite tortilla chip. So easy and so yummy!


It was windy and a little cloudy that evening, so the dinner barbequeing was a more solitary-get-it-done type event. We dined on pinwheel steaks, roasted potatoes, and broccoli. Followed by, drum-roll please, homemade carrot cake that my mom and I baked at the house before we left. I'll share this recipe with you later. It's a classic and so easy (if you have a food processor).


Even after we got back on dry land, our Memorial Day celebrations weren't through. The forecast said rain. But the view outside the window was sunny and mild. So we barbequed again and dined outside.


Mmmm, turkey burgers, corn, and chipotle sweet potato fries!


How did you celebrate Memorial Day?